I made this video starring all three of my boys to demonstrate the dangers of moving a child to the next, less protective, level of child restraint too soon.
Please share!

I'm a breastfeeding counselor with a side hobby in educating parents and caregivers in proper car seat use. I have four sons, one born by c-section and three born by VBAC. I blog about my life with four kids, pregnancy and birth, breastfeeding, and car seats.
Showing posts with label rear-facing. Show all posts
Showing posts with label rear-facing. Show all posts
Friday, June 28, 2013


Friday, June 7, 2013
Know How To Remove and Install Your Car Seats!
We bought a minivan last Thursday. What a relief it is to no longer have to stress about fitting three car seats across the back seat, of squishing my tall six-year-old into the tiny third row of our SUV, of having to choose between my kids' safety and space for groceries! I'm loving it! As part of the purchase, I opted to have them do fabric and paint protection. Having (eventually) four kids in the car will do a number on the upholstery, and I hope that having the protection will help when it comes to inevitable spills and whatnot.
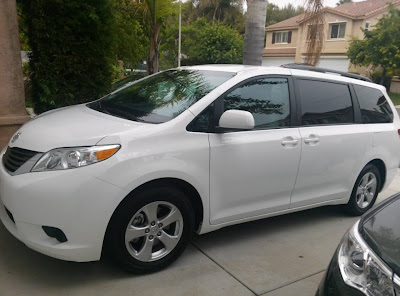
This necessitated my bringing my brand new van back to the service department and leaving it with them for the day and taking a rental car instead.
So, in the past week, I have taken two car seats out of the old car, installed them in the new car, then taken them out of the new car, installed them in the rental, taken them out of the rental, and re-installed them in the new car. All at 20 weeks pregnant, I might add.

And this brings me to my major point today. It is very important that you know how to remove and re-install your car seats properly.
While I often recommend that you have your seats installed and/or checked by a Certified Passenger Safety Technician (CPST) near you (often found as a free service through your local police or fire station or hospital), you also must know how to manage your car seats on your own. There will inevitably come a time when you need to move your car seat(s) from one car to another, or take them out to clean them or the car, or rearrange them.
1. Have your seats professionally installed at least once.
If you have the opportunity, absolutely have your car seats installed and/or checked by a CPST. This will reassure you that your seats are, in fact, being used correctly. If you make any changes, such as switching from an infant carrier to a convertible seat, or turning a rear-facing car seat to face front, or adding a second car seat, you may want to return to the CPST and have them reinstall or recheck your new configuration.
2. Ask the CPST to SHOW YOU HOW to install the seat yourself.
While the CPST is doing the installation, watch what they're doing. A good CPST will show you how to fasten and lock the seat belt or use the LATCH connectors, how much to tighten the belts, and how to tell if you have a good install. S/he should also be able to show you how to correctly buckle your child into the seat. If you can, take pictures of how the seat looks when it's correctly installed.
3. READ YOUR MANUAL.
While there are some generalities we can make about car seats, each one may have some slight differences in the details. You should be familiar with your manual, know where to find it (if you can't find the one that came in your box, most companies have them available online for download), and read the instructions when attempting to remove or install the seat by yourself.
4. Know these general rules.

This necessitated my bringing my brand new van back to the service department and leaving it with them for the day and taking a rental car instead.
So, in the past week, I have taken two car seats out of the old car, installed them in the new car, then taken them out of the new car, installed them in the rental, taken them out of the rental, and re-installed them in the new car. All at 20 weeks pregnant, I might add.

G likes the new van.
And this brings me to my major point today. It is very important that you know how to remove and re-install your car seats properly.
While I often recommend that you have your seats installed and/or checked by a Certified Passenger Safety Technician (CPST) near you (often found as a free service through your local police or fire station or hospital), you also must know how to manage your car seats on your own. There will inevitably come a time when you need to move your car seat(s) from one car to another, or take them out to clean them or the car, or rearrange them.
1. Have your seats professionally installed at least once.
If you have the opportunity, absolutely have your car seats installed and/or checked by a CPST. This will reassure you that your seats are, in fact, being used correctly. If you make any changes, such as switching from an infant carrier to a convertible seat, or turning a rear-facing car seat to face front, or adding a second car seat, you may want to return to the CPST and have them reinstall or recheck your new configuration.
2. Ask the CPST to SHOW YOU HOW to install the seat yourself.
While the CPST is doing the installation, watch what they're doing. A good CPST will show you how to fasten and lock the seat belt or use the LATCH connectors, how much to tighten the belts, and how to tell if you have a good install. S/he should also be able to show you how to correctly buckle your child into the seat. If you can, take pictures of how the seat looks when it's correctly installed.
3. READ YOUR MANUAL.
While there are some generalities we can make about car seats, each one may have some slight differences in the details. You should be familiar with your manual, know where to find it (if you can't find the one that came in your box, most companies have them available online for download), and read the instructions when attempting to remove or install the seat by yourself.
4. Know these general rules.
- Use LATCH or seat belt, but NOT BOTH to install the seat.
- Make sure you use the proper belt path for forward or rear-facing. This path should be marked on the side of the car seat itself.
- Make sure the LATCH or seat belt strap is not twisted as you feed it through the belt path.
- When forward-facing, you MUST use the top tether. If there is no hook for the top tether in the location you have chosen, then you cannot install the seat in that position.
- The LATCH or seat belt should be tight enough that you cannot jiggle the car seat more than ONE INCH side-to-side or forward and back.
- If using the seat belt, make sure that it is LOCKED. In newer cars, this simply means you should pull it all the way out and then let it retract. Tug on it to make sure it is locked.
- Look in both your car seat manual and your car's manual to check if the LATCH has an upper weight limit. If your child has reached this limit, you MUST install with the seat belt and stow the LATCH connectors.
Remember that the best car seat for your child is one that is installed and used correctly!
Monday, May 20, 2013
Ask-Me Monday 5/20/13: Infant Car Seats
This week's Ask-Me Monday video is for fan Megan, who asked, "How long should I use my infant car seat?" I've written several blog posts about car seats and extended rear-facing, and I'm excited to offer this video full of useful information about when it's time to stop using your infant car seat.
To submit a question for Ask-Me Monday, like Jessica on Babies on Facebook and comment to one of my Ask-Me Monday posts throughout the week. I'll select one question each week to answer in an Ask-Me Monday video. And subscribe to the channel so you don't miss any new videos!
To submit a question for Ask-Me Monday, like Jessica on Babies on Facebook and comment to one of my Ask-Me Monday posts throughout the week. I'll select one question each week to answer in an Ask-Me Monday video. And subscribe to the channel so you don't miss any new videos!
Monday, October 15, 2012
Car Seat Rule #2: The Whys and Hows of Rear-Facing
For the second in my sometime series on Car Seat Rules, let's talk a little bit about rear-facing. (Rule #1 is here.)
What is "rear-facing"?
We hear this term a lot. "Extended rear-facing." The AAP recommends "rear-facing" for at least two years. Use a "rear-facing" infant or convertible car seat.
It's simple, really. Rear-facing means that the child will ride facing the back of the car.
What is "extended rear-facing"?
"Extended" just implies that you keep your child rear-facing longer than the law requires. In most states, the law requires that your baby be rear-facing until at least 20 pounds AND one year old. Most convertible car seats also state that you should not turn the car seat to face forward until your child is 20 pounds AND one year of age. "Extended rear-facing" means that you keep your child rear-facing well beyond the 20-pound/one-year minimum. Most organizations interested in child safety, such as the NHTSA and the AAP, recommend you keep your child rear-facing until at least two years old, or as long as he or she fits within the height and weight limits of the rear-facing car seat.
Why is rear-facing safer?
Facing backwards is safer than facing forwards because, in a crash, inertia will cause everyone in the car to continue moving forward. (The car stops, but the people inside will still be moving forward at whatever speed the car was going when the crash happened.) The occupants of the car will be held in place (hopefully) by their seatbelts or their car seat harnesses. This puts stress on the neck, shoulders, and spine of forward-facing passengers, because the shoulders and body are held back by the restraint, but the head and arms are free to continue their forward motion. In a child, this can cause severe neck and spine injuries, shoulder injuries, and even death, as the weight of a child's head traveling forward with the force of the crash can stretch the spine as much as two inches and may break the child's neck.
By contrast, if a child is facing backwards in a car seat, the whole body will be pressed back into the seat, distributing the crash force over the body and the car seat itself, which is built to withstand these forces. The child's body will be cradled by the seat and held in a normal position, instead of the head being flung forward, as it would be when facing front.
In other words, to put it harshly, rear-facing versus front-facing can be the difference between your child's escaping unscathed or being killed in a crash.
How do I install my car seat rear-facing?
Unless you have a car seat that can be adjusted while installed (such as the Britax Boulevard or Pavilion), sometimes marketed as a "no re-thread harness", then adjust the straps before you install the car seat. Recline the seat and sit your baby or child in the seat. Find the strap slots that are closest to your child's shoulders but still BELOW them. Having the straps at or below the shoulders prevents the child from sliding up the back of the seat in a collision. Unhook the shoulder straps from the metal clip at the back of the car seat and pull them out of the slots, then thread them through the correct slots. Make sure the straps are not twisted or folded. Reconnect the straps to the metal hook. Then install the car seat. As your child grows, you will need to re-thread the straps occasionally to keep up with him, so learning this process will be helpful.
How do I buckle my child in?
*For most modern car seats, you tighten the harness by pulling on the long strap that comes out of the front of the car seat. To loosen the harness, press the button or pull the lever near where this pull strap emerges from the seat and tug on the harness to loosen it. Consult your car seat's manual for instructions on tightening and loosening the harness. Most car seats are similar and straightforward when it comes to tightening and loosening the straps.
How long can my child rear-face?
A child can stay rear-facing until he reaches the height or weight limit of his car seat. Many, many convertible car seats these days have a rear-facing weight limit of 40 pounds or more. My 3.5-year-old, who is above the 50th percentile in height and weight, is only 33 pounds, to give you an idea of how long that could be. A seat is outgrown by height for rear-facing when the top of the child's head is within one inch of the top of the car seat shell when seated in it properly.
Don't worry about your child's legs being "scrunched" or "squished" up against the back of your vehicle seat. Legs bend. Children will adapt, by crossing their legs, resting their feet up high on the back of the seat, or draping their legs over the sides of their car seat, and be perfectly comfortable. And even if, G-d forbid, you are in a crash and your child's leg breaks, a broken leg is a much less severe injury than a broken neck. For the record, there are no documented cases of a child suffering leg injuries as a result of being rear-facing in a car accident.
This YouTube video clearly (and tragically) illustrates the dangers to a baby's neck and shoulders if front-facing in a car accident.
What is "rear-facing"?
We hear this term a lot. "Extended rear-facing." The AAP recommends "rear-facing" for at least two years. Use a "rear-facing" infant or convertible car seat.
It's simple, really. Rear-facing means that the child will ride facing the back of the car.
What is "extended rear-facing"?
"Extended" just implies that you keep your child rear-facing longer than the law requires. In most states, the law requires that your baby be rear-facing until at least 20 pounds AND one year old. Most convertible car seats also state that you should not turn the car seat to face forward until your child is 20 pounds AND one year of age. "Extended rear-facing" means that you keep your child rear-facing well beyond the 20-pound/one-year minimum. Most organizations interested in child safety, such as the NHTSA and the AAP, recommend you keep your child rear-facing until at least two years old, or as long as he or she fits within the height and weight limits of the rear-facing car seat.
Why is rear-facing safer?
Facing backwards is safer than facing forwards because, in a crash, inertia will cause everyone in the car to continue moving forward. (The car stops, but the people inside will still be moving forward at whatever speed the car was going when the crash happened.) The occupants of the car will be held in place (hopefully) by their seatbelts or their car seat harnesses. This puts stress on the neck, shoulders, and spine of forward-facing passengers, because the shoulders and body are held back by the restraint, but the head and arms are free to continue their forward motion. In a child, this can cause severe neck and spine injuries, shoulder injuries, and even death, as the weight of a child's head traveling forward with the force of the crash can stretch the spine as much as two inches and may break the child's neck.
By contrast, if a child is facing backwards in a car seat, the whole body will be pressed back into the seat, distributing the crash force over the body and the car seat itself, which is built to withstand these forces. The child's body will be cradled by the seat and held in a normal position, instead of the head being flung forward, as it would be when facing front.
In other words, to put it harshly, rear-facing versus front-facing can be the difference between your child's escaping unscathed or being killed in a crash.
How do I install my car seat rear-facing?
- You may use either LATCH or the car's seat belt (but NOT BOTH).
- Find the rear-facing belt path or LATCH path by consulting your car seat manual. It should also be clearly marked on the car seat itself. Make sure the LATCH strap is fed through the right path, is not twisted, and is under the car seat padding. Locate the LATCH connectors in your car in the crease where the seat and seat back meet. (There should be a little LATCH symbol on the seat where the hooks can be found.
 )
) - Make sure your seat is at the appropriate recline angle, as designated by the car seat manual.
- Connect the LATCH or feed and buckle the seat belt as shown in the manual.
- Tighten. If using LATCH, lean your knee or hand with as much weight as possible into the seat and pull tight the LATCH straps. If using a seat belt, pull the belt all the way out until it locks, then allow it to retract as far as you can. Put some weight into the car seat and pull that seat belt tight.
- With LATCH and with seat belt, make sure the straps are not twisted at any point.
- Your seat is installed when you cannot wiggle it more than one inch side-to-side or forward-and-back while grasping the seat at the belt path with your stronger hand. (In other words, the seat may still move a little bit, but it shouldn't move back and forth too much. One inch of movement in any direction is the maximum.)
Unless you have a car seat that can be adjusted while installed (such as the Britax Boulevard or Pavilion), sometimes marketed as a "no re-thread harness", then adjust the straps before you install the car seat. Recline the seat and sit your baby or child in the seat. Find the strap slots that are closest to your child's shoulders but still BELOW them. Having the straps at or below the shoulders prevents the child from sliding up the back of the seat in a collision. Unhook the shoulder straps from the metal clip at the back of the car seat and pull them out of the slots, then thread them through the correct slots. Make sure the straps are not twisted or folded. Reconnect the straps to the metal hook. Then install the car seat. As your child grows, you will need to re-thread the straps occasionally to keep up with him, so learning this process will be helpful.
How do I buckle my child in?
- Sit your baby or child in your correctly-installed and adjusted seat.
- Make sure his bottom is all the way back against the seat.
- Put his arms through the straps and pull the crotch strap up between his legs.
- Fasten the buckles of the harness and tighten the harness* until you cannot pinch and hold a fold of the strap at the child's collarbone. The straps should be tight, like a hug, but not uncomfortable. If the straps are too loose, your child could be ejected from the seat or not be restrained properly in a crash.
- Now buckle the chest clip (if your seat is equipped with one - nearly every seat on the market in the U.S. has one; European seats do not). Place the chest clip in line with your child's armpits. (See Car Seat Rule #1 for more information on using the chest clip.)
*For most modern car seats, you tighten the harness by pulling on the long strap that comes out of the front of the car seat. To loosen the harness, press the button or pull the lever near where this pull strap emerges from the seat and tug on the harness to loosen it. Consult your car seat's manual for instructions on tightening and loosening the harness. Most car seats are similar and straightforward when it comes to tightening and loosening the straps.
How long can my child rear-face?
A child can stay rear-facing until he reaches the height or weight limit of his car seat. Many, many convertible car seats these days have a rear-facing weight limit of 40 pounds or more. My 3.5-year-old, who is above the 50th percentile in height and weight, is only 33 pounds, to give you an idea of how long that could be. A seat is outgrown by height for rear-facing when the top of the child's head is within one inch of the top of the car seat shell when seated in it properly.
Don't worry about your child's legs being "scrunched" or "squished" up against the back of your vehicle seat. Legs bend. Children will adapt, by crossing their legs, resting their feet up high on the back of the seat, or draping their legs over the sides of their car seat, and be perfectly comfortable. And even if, G-d forbid, you are in a crash and your child's leg breaks, a broken leg is a much less severe injury than a broken neck. For the record, there are no documented cases of a child suffering leg injuries as a result of being rear-facing in a car accident.
This YouTube video clearly (and tragically) illustrates the dangers to a baby's neck and shoulders if front-facing in a car accident.
Subscribe to:
Posts (Atom)